Indiemark Lens Encoder
Indiemark Encoder Overview
On this page, we'll go over the setup and operation of the Indiemark Lens Encoder.
Overview

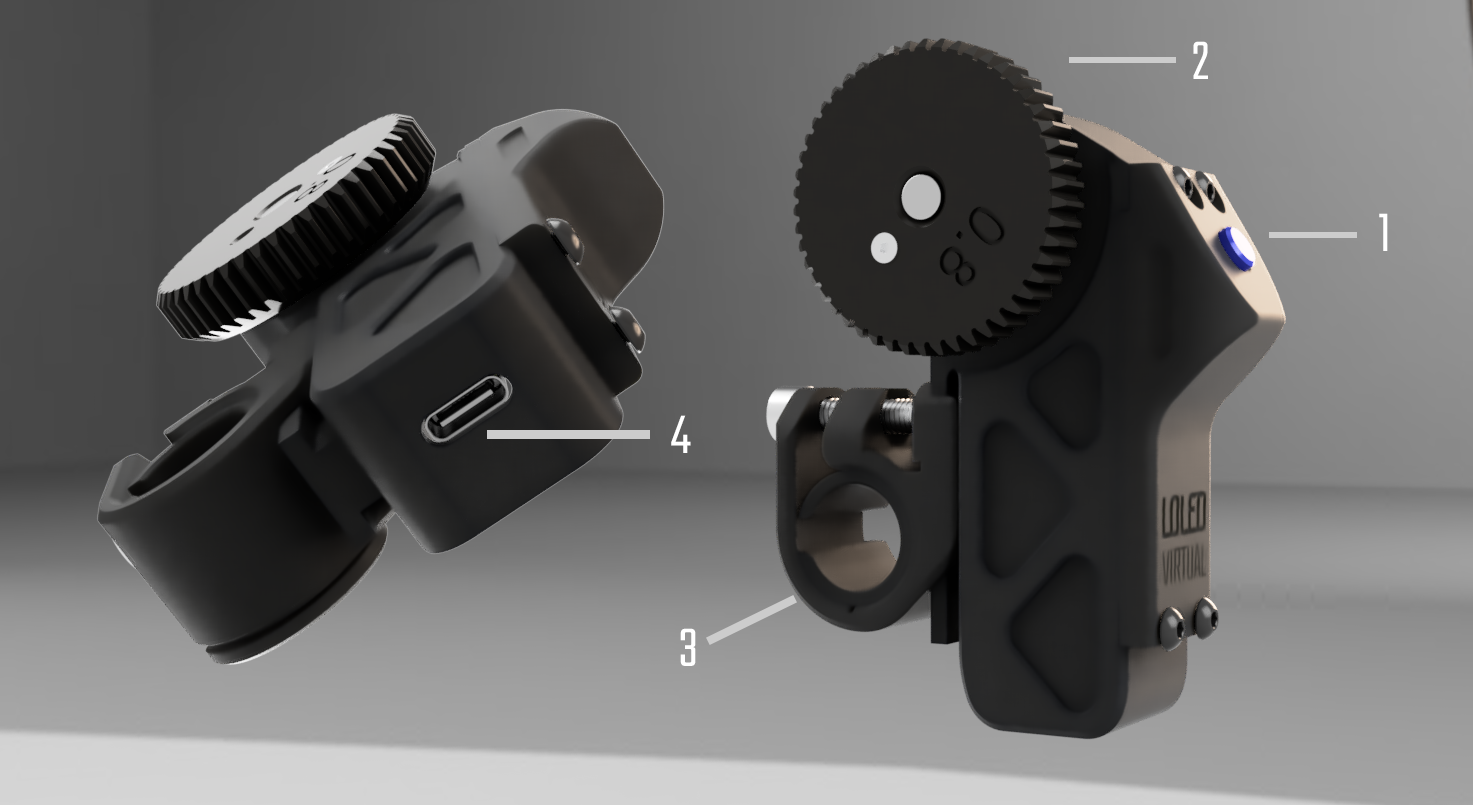
- Zero Button
- Used to reset the encoder to Zero
- Lens Gear
- Replacable, interfaces with lens.
- Rod Clamp
- Standard 19mm clamp with a 15mm reducer bushing (included.)
- USB Port
- Provides power to Encoder
Physical setup
Choose the gear that correctly interfaces with your lens. Gears can be replaced by using the included 1.3mm allen wrench.
Select the rod clamp that fits your setup, and slide it onto the clamp track. Tightening the knob will lock the clamp. When first powered on, the encoder will blink to indicate it needs to be zero'd.
It doesn't matter which side of the lens you mount the encoders. When you Zero the encoder, it will report positive values no matter which direction it is spun.
Set the lens to the following settings:
- Focus: Close focus
- Iris: Widest aperture
- Zoom: Widest focal length
Once set, press the Zero button to zero the encoder. You are now set.
Using Multiple Encoders
An easy way to connect multiple encoders to one camera is to connect them all to a USB hub, and then run an active USB cable back to the PC.
https://www.amazon.com/dp/B07MFW93B4/ref=cm_sw_em_r_mt_dp_S9MN5324WR8KVF70TX1K?_encoding=UTF8&psc=1
https://www.amazon.com/dp/B07L32B9C2/ref=cm_sw_em_r_mt_dp_RXNN5TPZ0PV8B7DW4AGW
Specs
- Weight: 100grams
- Poll rate: 1ms
- Dimensions without lens Gear: 51mmx89mmx22mm
- Resolution: 11 bit, 2000 counts per rev, 0.18 degrees (with gear)
- Power: 5V 100mA
- Port: USB type C
- Spindle diameter: 6mm
- Material: PA12 Nylon
