Glassmark II Lens Encoder
Glassmark II Encoder Overview
On this page, we'll go over the setup and operation of the Glassmark II Lens Encoder.
Overview

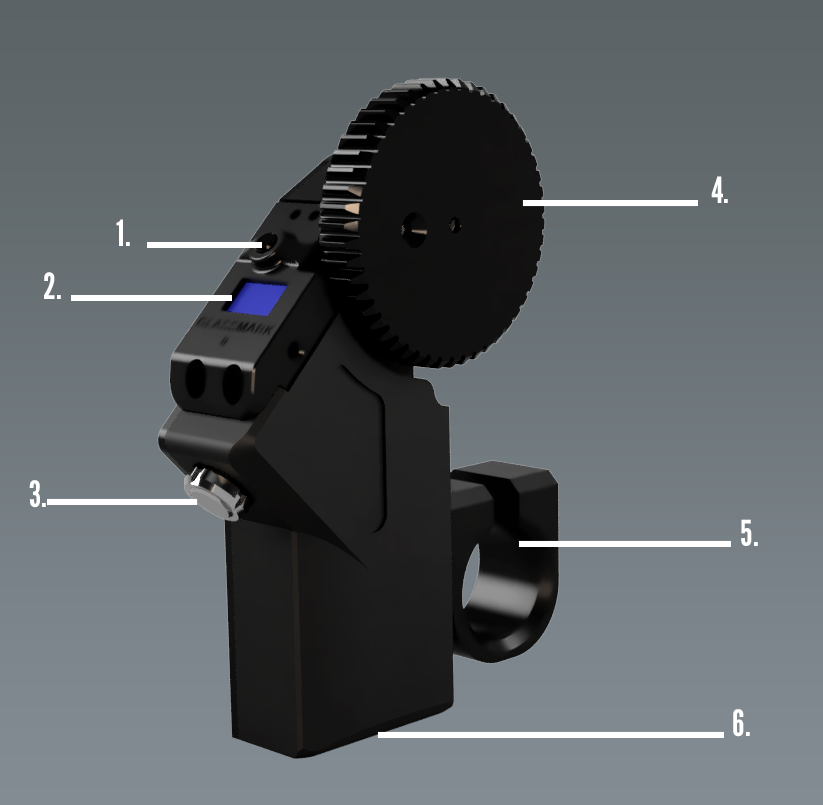
- Zero Button
- Used to reset the encoder to Zero
- OLED SCREEN
- Provides informtion as to status of encoder
- LEMO 0B Port
- Provides power and serial communication via Conduit
- Lens Gear
- Replacable, interfaces with lens.
- Rod Clamp
- Standard 19mm clamp with a 15mm reducer bushing (included.)
- USB Port
- Used for USB communication and firmware updating
Physical setup
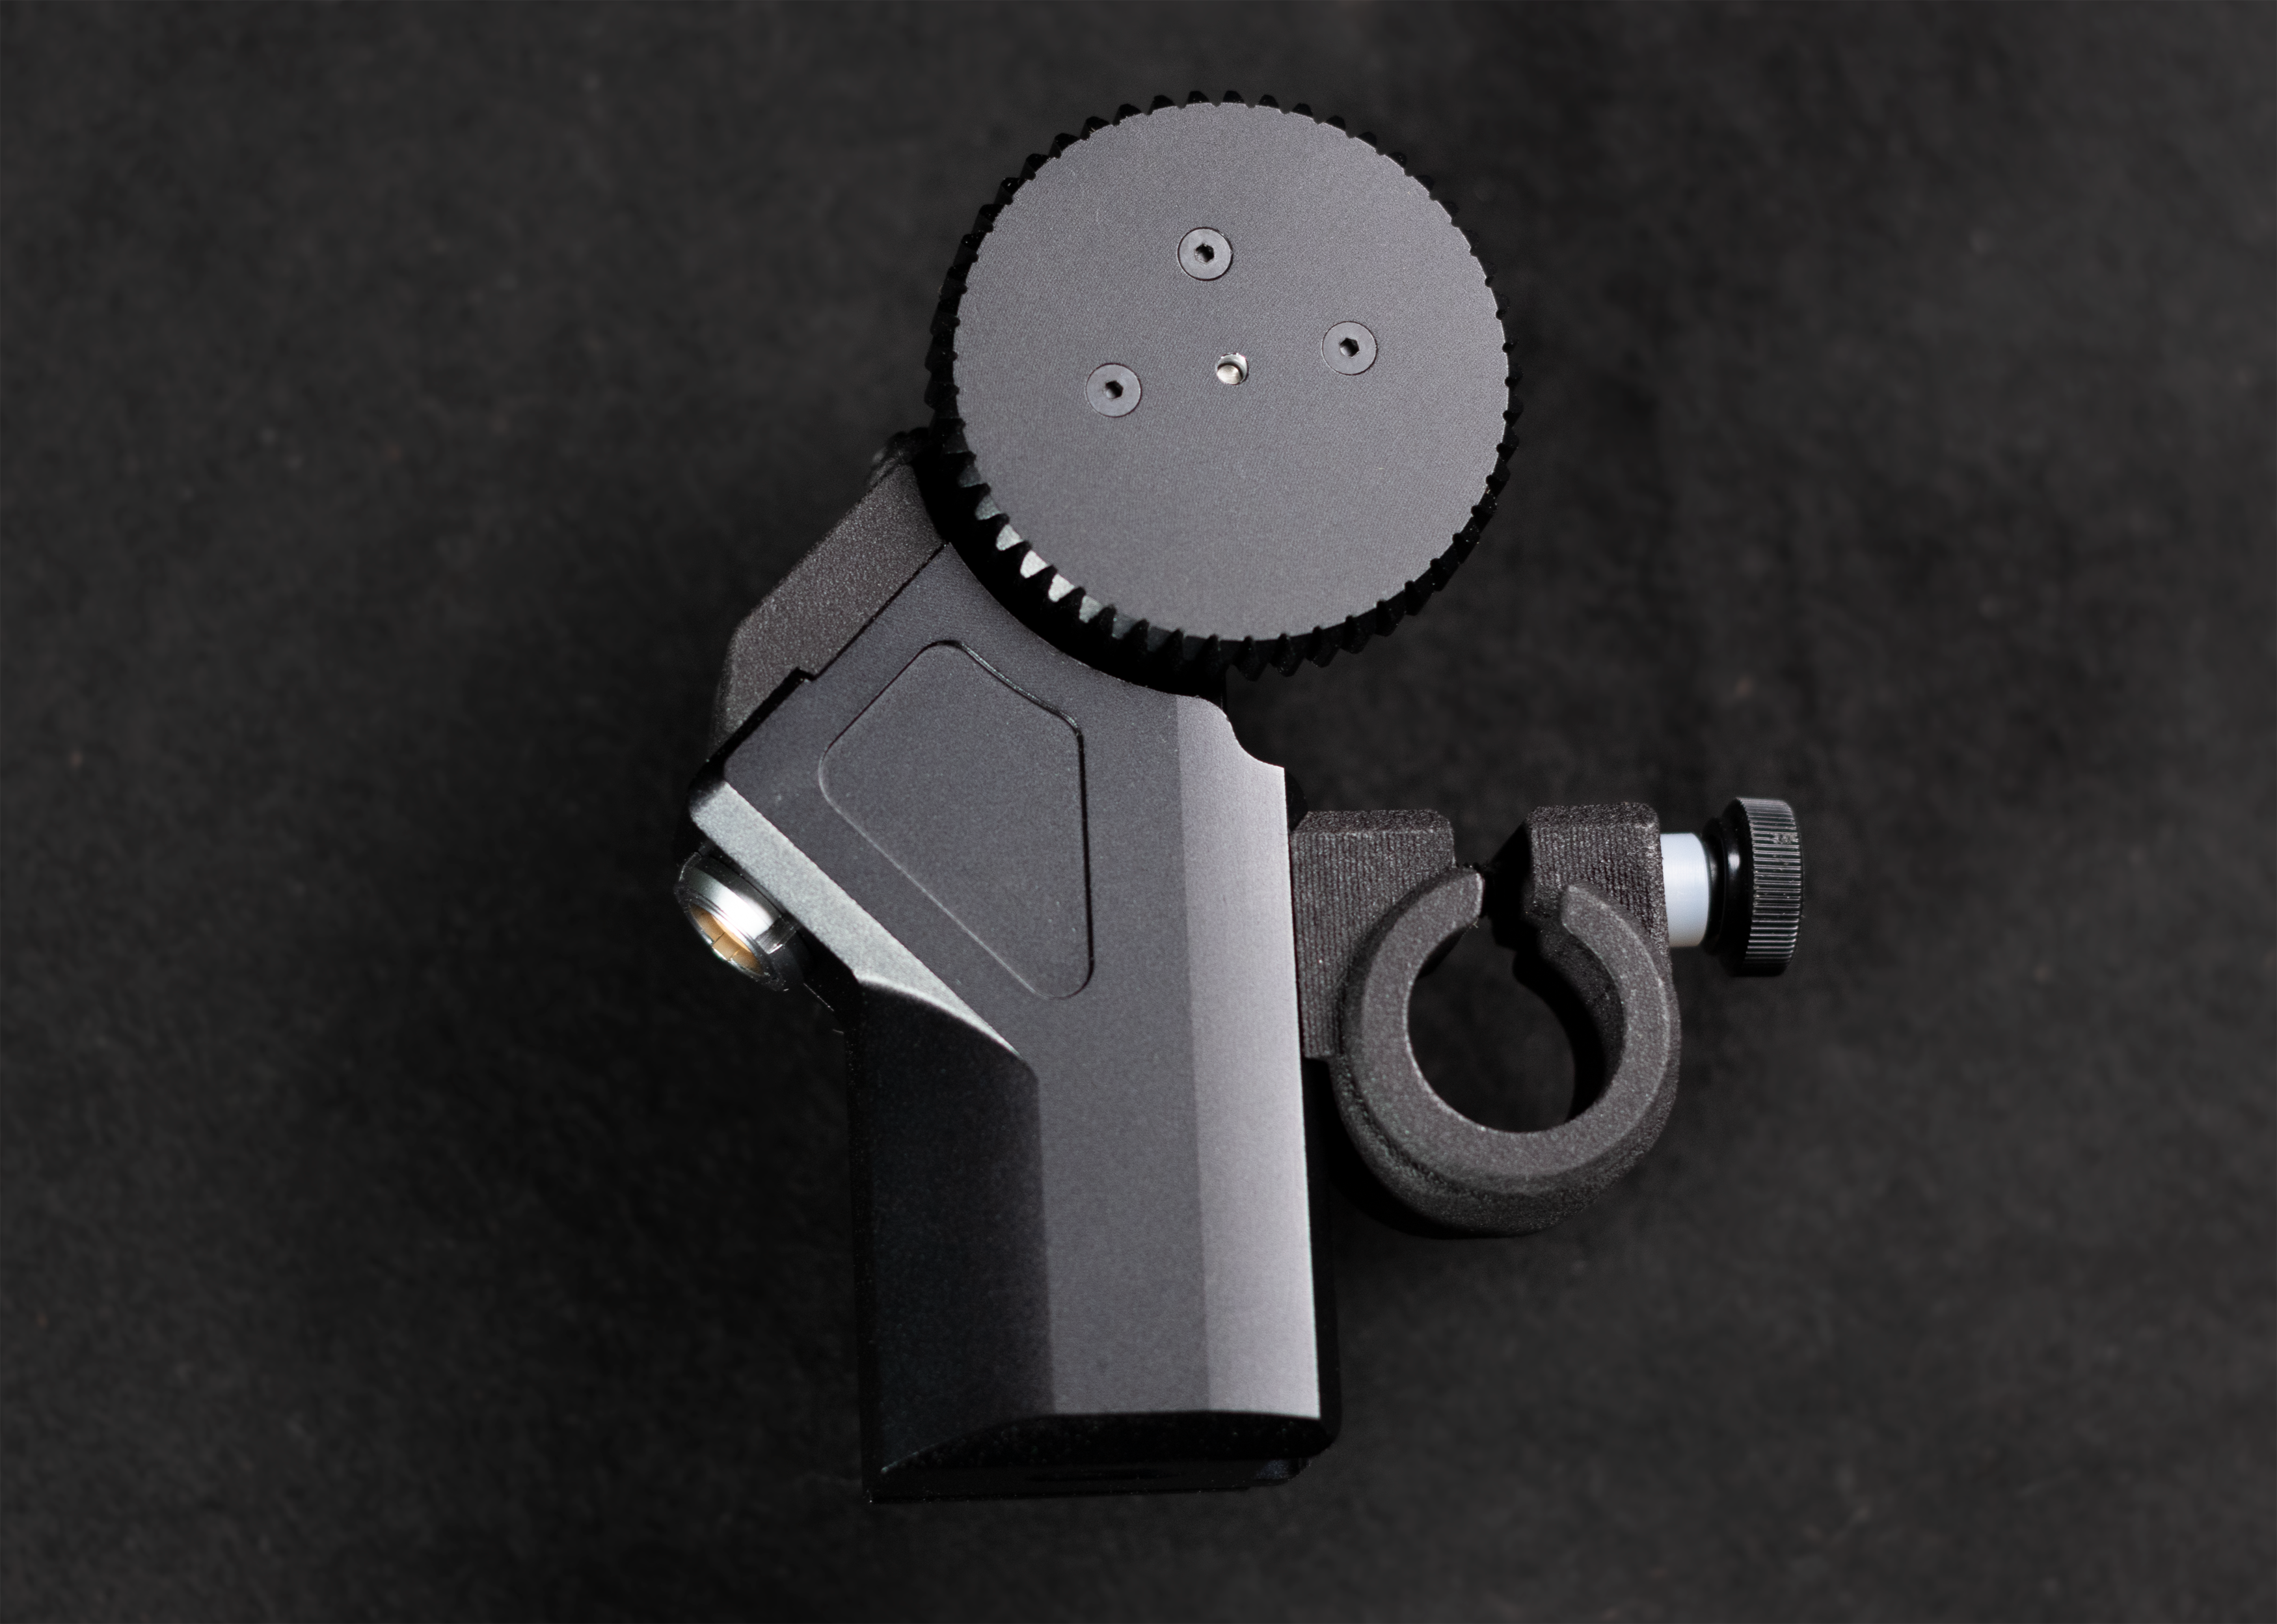
Choose the gear that correctly interfaces with your lens. Gears can be replaced by using the included 1.3mm allen wrench.
Select the rod clamp that fits your setup, and slide it onto the clamp track.
- Before securing the encoder on your rods, rotate the lens to an "average" position. This should be a point at which the lens will often pass during normal usage. Manually rotate the encoder so that the center screw on the gear is facing upwards, and tighten the encoder to the rods and lens.
- Rotate the lens to the "0" position
- Plug in and power up the encoder
- Press the Zero button to zero the encoder
- Rotate the lens back to the "average" position. The encoder will change from saying "Not Indexed" to "Indexed 0"
During usage, the first time the gear passes the top of the encoder, it's position will be stored internally. Each time the mark passes this position throughout the day, the current position will be compared to this stored position. If the position has changed, due to missed steps or drift, it will be reverted back to the original. This allows the encoder to remain extremely stable over the course of a shoot day!
Tightening the knob will lock the clamp to the encoder and rods.

Zeroing
When first powered on, the encoder will indicate it needs to be zero'd.
It doesn't matter which side of the lens you mount the encoders. When you Zero the encoder, it will report positive values no matter which direction it is spun.
Set the lens to the following settings:
- Focus: Close focus
- Iris: Widest aperture
- Zoom: Widest focal length
Once set, press the Zero button to zero the encoder.
Communication and frame sync
We realize that by adding Conduit boxes and two pieces of software, we've made understanding the system a little confusing to the customer. In this section, we'll try and clarify how everything connests.
| Feature | Software | Hardware |
|---|---|---|
| Basic Lens Encoding | LONET Server (free) | Glassmark II Encoder |
| Unreal/Aximmetry/Disguise encoder data output | LONET Server (free) | Glassmark II Encoder |
| Frame Sync | Reality Field Base | Conduit Box |
| PoE and Ethernet | Reality Field Base | Conduit Box |
| USB Serial | LONET Server (free) | Glassmark II Encoder |
Specs
- Weight: 250grams
- Dimensions without lens Gear: 43mmx87.4mmx18.5mm
- Resolution: 4000 counts per rev
- Power: 5V 100mA
- Port: LEMO 0B 4 pin, USB type C
- Spindle diameter: 2mm
- Material: CNC Aluminum
